Houston and Gulf Coast Real Estate News & Updates

Be sure to bookmark our blog page at the top, visit our Facebook and check in often as new information will be added to include Market Updates, Houston and Gulf Coast Real Estate News, Local Community Development and Tips on Real Estate.

July 16, 2021

5 Tips to Quickly Sell House for the Best Price

  1. Do the things you always said you would/should do. Now is the time to do these things. This includes fixing broken fences, cleaning up your yard and landscaping, fixing minor things around the house, worn out / broken outlets and light switches, etc.
  2. Walk through your house as if you’re a prospective buyer. Check water taps, if they are leaking, fix them. Turn your appliances off and on and make sure they are working. Check all the housing appliances and make sure they work properly. Light bulb dimmed, or not working, replace it. Do all the things a buyer would check when walking through a house.
  3. We can’t stress this enough, but one of the best things to do to sell a house is to de-clutter. Try to open your floor plan by removing excess furniture. Remove trash, debris, old packaging, boxes, and get them out of the house. We tell people, the goal is to make the house as close as possible to a “museum\show home” for buyers to walk through.
  4. Ask your Realtor to walk through your house before listing it. At OwnYourParadise.com we walk through all our client’s homes long before putting them on the market.
  5. Request a Comparable Market Analysis (CMA) from your Realtor and see what other houses are offering with regards to amenities, such as appliance packages, housing upgrades, etc, and then try to match them. For example, if you are doing a kitchen remodel and planning to sell your house afterward, check the houses in the neighborhood to see if they are all selling with a base appliance package or stainless packages. If the houses are all selling with stainless steel, then we would recommend putting in stainless steel. Deep clean your house, either by yourself or have it professionally cleaned, but do it. No one wants to see another person's dirt and it is so easy not to recognize it in your own home.

Bouns Tip - Tell your Realtor what you love about your house, neighborhood, community, location, etc. This information is invaluable and makes the Realtor’s job much easier when creating a description for your house, matching your house up with buyers, or talking to other Realtors who are representing buyers.

Thinking of selling your house? Call us today at 281-616-8401 and we will come out to your property, walk through it, and give you advice tailored to your house for an optimal selling experience.

June 25, 2021

What You Should Do Before Working with a Realtor

As realtors we want your home buying/selling process to be as comfortable as possible and therefore we have put together a list of what you should do before contacting a realtor and then what you need to tell a realtor before you begin the process of looking for a house.

  1. Work with a mortgage broker to see what you’re financially capable of buying and the type of loan you are qualified for. A mortgage broker will access your credit rating, assets, debt to income ratio, and will be able to tell you how much you can expect a bank to lend. This information is needed when it comes to saving yourself time and heartache. As a realtor, we don’t want to take you to a house you will love but can’t afford. This is a letdown for all parties involved and something we want to avoid. If you don’t have a mortgage broker you are working with, ask your realtor to recommend one. Don’t be surprised if a realtor refuses to show you any houses until they know what that you are pre-qualified for a mortgage.
  2. Tell your realtor what type of home loan/s you qualify for. Are you qualified for an FHA, Conventional, or VA Loan? Let the Realtor know because some home loans are specific with regards to what homes you can buy. This information is also included in the pre-approval letter from the mortgage broker.
  3. If you need down payment assistance, let your realtor know. Down payment assistance (DPA) is for more than first-time homebuyers and there are a variety of DPA programs and services available. At Hidden Paradise Realty Team, we recommend numerous DPA programs that assist buyers with their down payment, but you need to let us know as early as possible in the buying process. DPA is not always the best option for you as a buyer, as there are strings attached.
  4. Be clear on what you are looking for, what your needs are, and where you want the house to be located and why. Also, decide what is a necessity and what is a want. Right now, we are in a seller’s market, and you might have to compromise a little on what you want so a realtor can find you a house you need and that you can afford. When you’re working with a Realtor, they will actively search for a house for you and they will set up a listing notification for houses that match your criteria, but if you are too specific and not flexible with your “needs and wants” then it can dramatically increase the time it takes to find your new home.
June 16, 2021

3 Tips for Finding a Great Realtor

Getting your house prepared to be listed, listing it, and then managing offers and contractual responsibilities is not an easy task and it becomes many times more difficult when you have a Realtor that is not a good fit for you. We have put together a list of ways to find the right Realtor for your housing transaction

  1. Check Realtor Reviews as well as the reviews. We can’t stress this enough as reviews tell you such a lot about a Realtor’s business model and how they operate. This also provides valuable information on how they handle their clients.The following is a list of websites and ways you can find realtor reviews -;

    HAR.com

    Zillow and using their agent search engine -Realtor & Real Estate Agent Reviews | Zillow

    Realtor.com Agent Search - Find Real Estate Agents and Brokers in Your Area | realtor.com®

    Google My Business – Search Google for the Agent’s name or brokerage and look for a Google Business listing with reviews.

    Search for a Facebook Business Page where clients might have left reviews

  1. Look for Realtors who are Area Experts, who preferably live in and intimately know the neighborhoods and housing market conditions that they operate in.
  2. Find a Realtor that you feel comfortable with and don’t be afraid to ask a brokerage if you can work with another Realtor if needed. At Hidden Paradise Realty Team, we strive to make our clients feel comfortable with their Realtor and if you want to work with a different Realtor in the office, just ask.

The process of buying/selling a house can be very stressful but having the right Realtor can make all the difference in the world. Contact us at 281-616-8401 today to see if we are a good fit for your next housing transaction.

Jan. 10, 2021

Top New Kitchen Counter Materials

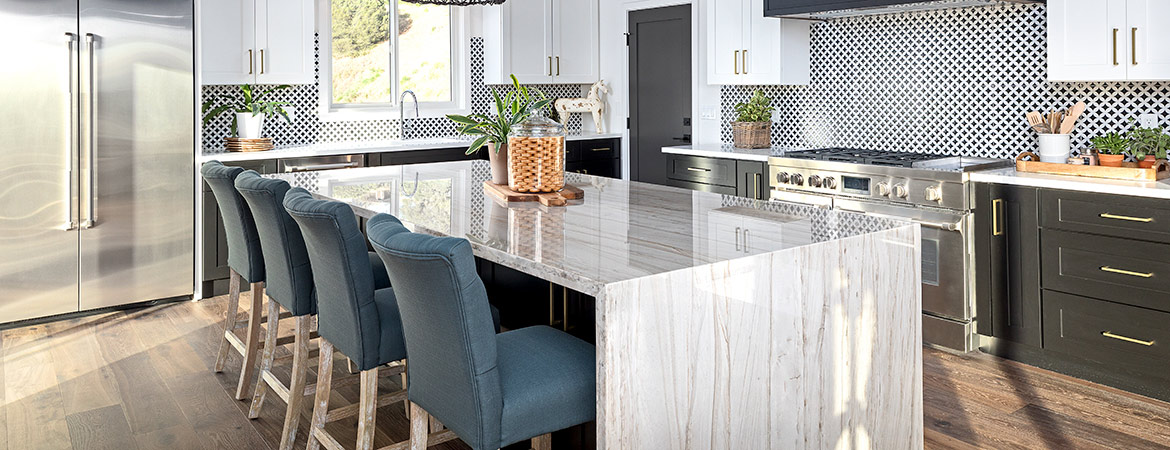
What is the reigning kitchen counter material today? If you’re ready to replace your kitchen counters, the quick answer is, quartz is king. The more useful takeaway for you, however, should be that quartz is only one of many high-quality, interesting materials you can choose from. And more is always better.

It was not always this way. If you’re not quite old enough to remember 1970s-era kitchen counter materials, be glad. Laminate countertops were king. The problem with laminate? It was about the only material to choose from at the time. The 1980s saw solid surface counters succeed laminate, followed in the 1990s by the next in line to the throne—granite—which at that time had become a more affordable kitchen counter material. Today, granite is still glorious, but it’s porous, which is a big reason why the crown passed to the non-porous quartz.

Which Kitchen Counter Material Should You Choose?

Most kitchen designers are recommending quartz more and more. A big reason for its dominance is that quartz is an engineered stone, so its non-porous surface makes it a solid barrier against germs. Quartz is also stainless and does not require sealing—two big drawbacks to granite. A more recent engineering development may be the biggest reason why quartz countertops have eclipsed granite. Quartz manufacturers can now replicate the more natural patterns that are the appeal of real stone granite countertops. But while quartz may be today’s designer choice, you have options. If quartz is not your king, take some time to research these other top choices in kitchen counter materials:

  • Butcher block
  • Ceramic tile
  • Concrete
  • Copper
  • Corian
  • Granite
  • Laminate
  • Marble (such as Carrara)
  • Paper composite
  • Recycled aluminum
  • Recycled glass
  • Soapstone
  • Solid surface
  • Stainless steel
  • Stone tile
  • Wood (such as bamboo, beech, maple, teak, walnut, as well as reclaimed wood)
  • Zinc

Are you a first-time homeowner, starting a family, empty nester, or maybe a real estate investor? Your lifestyle plays a big role in choosing the right kitchen counter material. The appeal of today's materials may be the many options you have, but thinking about what fits your life is paramount. Consider what you need, then plug any of the materials listed here into a web search and do your homework.

Posted in Home Owner Tips
Jan. 9, 2021

Top New Kitchen Counter Materials

Top New Kitchen Counter Materials

What is the reigning kitchen counter material today? If you’re ready to replace your kitchen counters, the quick answer is, quartz is king. The more useful takeaway for you, however, should be that quartz is only one of many high-quality, interesting materials you can choose from. And more is always better.

It was not always this way. If you’re not quite old enough to remember 1970s-era kitchen counter materials, be glad. Laminate countertops were king. The problem with laminate? It was about the only material to choose from at the time. The 1980s saw solid surface counters succeed laminate, followed in the 1990s by the next in line to the throne—granite—which at that time had become a more affordable kitchen counter material. Today, granite is still glorious, but it’s porous, which is a big reason why the crown passed to the non-porous quartz.

Which Kitchen Counter Material Should You Choose?

wood kitchen counterMost kitchen designers are recommending quartz more and more. A big reason for its dominance is that quartz is an engineered stone, so its non-porous surface makes it a solid barrier against germs. Quartz is also stainless and does not require sealing—two big drawbacks to granite. A more recent engineering development may be the biggest reason why quartz countertops have eclipsed granite. Quartz manufacturers can now replicate the more natural patterns that are the appeal of real stone granite countertops. But while quartz may be today’s designer choice, you have options. If quartz is not your king, take some time to research these other top choices in kitchen counter materials:

  • Butcher block
  • Ceramic tile
  • Concrete
  • Copper
  • Corian
  • Granite
  • Laminate
  • Marble (such as Carrara)
  • Paper composite
  • Recycled aluminum
  • Recycled glass
  • Soapstone
  • Solid surface
  • Stainless steel
  • Stone tile
  • Wood (such as bamboo, beech, maple, teak, walnut, as well as reclaimed wood)
  • Zinc

Are you a first-time homeowner, starting a family, empty nester, or maybe a real estate investor? Your lifestyle plays a big role in choosing the right kitchen counter material. The appeal of today's materials may be the many options you have, but thinking about what fits your life is paramount. Consider what you need, then plug any of the materials listed here into a web search and do your homework.

Posted in Home Owner Tips
Jan. 9, 2021

Should You Convert Your Garage?

[et_pb_section fb_built="1" admin_label="section" _builder_version="3.22"][et_pb_row admin_label="Info 1 row" _builder_version="3.25" background_size="initial" background_position="top_left" background_repeat="repeat" collapsed="on"][et_pb_column type="4_4" _builder_version="3.25" custom_padding="|||" custom_padding__hover="|||"][et_pb_text admin_label="Info 2 Text" _builder_version="4.9.0" background_size="initial" background_position="top_left" background_repeat="repeat" hover_enabled="0" sticky_enabled="0"]

You’ve moved into a new home and already you’re bursting at the seams. You’ve discovered what most homeowners eventually learn: it doesn’t take long to fill every available space in a home. When that happens, and an addition is not in the budget, you do have another option. Convert your garage to a usable space. Sometimes, you just need more house, more than you need to house the car.

Converting vs. Adding to Make More Room

According to HomeAdvisor, “the average national cost of adding a room or building an addition is $43,892, with most homeowners spending between $20,899 and $67,431.” Depending on what you plan to use your garage for, converting it could cost as little as $1,500. In a separate survey, HomeAdvisor found that homeowners “paid between $5,997 and $19,281 [or] on average, converting a garage costs $12,043.” Bottom line: It can be more cost-effective to convert your garage. Pro tip: You should also check with your local building department to see if a garage conversion requires a permit. You may not need one, or may only need one if you intend to have plumbing and/or a kitchen as part of a conversion. Regardless, permitting can be an added cost to consider.

Ideas for Your Garage Makeover

Once you have decided to convert your garage, it’s time for the fun part—deciding what type of room to create. Here are some of the most popular uses for a converted garage, sorted according to generally less- and more-expensive ideas. Often, a conversion can cost less when you already have the items you need more space for, like kids toys for a play room, or equipment for a gym, gaming, or office space. The biggest expense, after you convert a garage, will be buying those items that complete certain kinds of rooms, like a home cinema, bar, or a guest house. Less Expensive

Tips for Converting Your Garage on Budget

When you convert your garage, consider keeping the conversion simple. The benefit to that is you'll be able to more easily convert it back later. There may come a time when you no longer need the extra space, or your budget allows you to add room onto the house; or you may someday decide to sell. (Keep always in mind that, depending on your location, converting may potentially be a double-edged sword. Be sure to do your homework so you understand how any changes you make could affect your home’s resale value.) The biggest benefit to keeping it simple? You can do the work more inexpensively, which is the focus of the updates and improvements described next. Most of these ideas you can also do yourself, which can help keep your costs down. (For even more ideas and inspiration, check out our Pinterest page.)

Heating and Cooling

If you have an attached garage, your current HVAC system may be able to support the extra space. For about $200, you can hire an HVAC inspector to assess whether or not your system can cover the garage. The cost of expanding a system with additional ducts and vents depends on the square footage of your garage, but typically, expanding a system can range between $500 and $2,000. It's important to also check with your local building department about any life-safety code issues with expansion to a garage. If an inspector assesses that your system won’t accommodate an expansion, you may have the option to update it, but that would also up your cost considerably. For a standalone garage, or when central heating and cooling expansion is out, reasearch these less costly options:

  • Forced air heater
  • Floor unit or overhead heater
  • Infrared heater
  • Gas or wood burner
  • Window air conditioning unit
  • Portable room air conditioner

Insulation

No matter how you heat or cool your garage, you should add insulation. Look into less expensive alternatives such as recycled foam board or spray foam. You can DIY either with a little help from the internet—there are scores of video to walk you through installation. If you live where winters are cold and want to create a comfortable environment for year-round use, you may need the more expensive, higher R-value insulation like what you have in your home. Factor your climate into every decision you make around converting the garage.

Walls

If your garage walls are unfinished (stud walls only), you’ll need to finish them before adding insulation. The problem is, most standard materials for finishing, such as wallboard (a.k.a, drywall), plywood, or paneling are expensive. There are less costly options to consider, including materials such as shiplap or galvanized metal. You’ll want to buy them pre-cut into panels if you DIY, so shop around for the best price when looking at these options. Of course, if your garage has finished walls, painting them does not have to be the only option. Peel and stick wallpaper is so inexpensive, easy to work with, and comes in so many variations, you can create any look for your space and apply it in a day. From brick to barn wood to tin and more, you can peel and stick your way to a new room.

Flooring

Depending on what you plan to use the new space for, you’ll find many options for garage flooring. Some less expensive options include:

  • Concrete paint kit (epoxy-based) for coating floor
  • Resurfacing kits for concrete floors
  • Acid-staining kits for concrete floors
  • Garage floor mats
  • Rubber or vinyl flooring rolls
  • Engineered wood flooring
  • Garage floor tiles

You can DIY all of these options with a bit of research and some prep time. Should you ever decide to convert the space back to a garage, the first three options in list above can stand up to cars as is, while the last four are removable, so you can return to the original concrete floor. You could also consider carpeting, but it is a more expensive option, and the space needs to be well-insulated to avoid mold and moisture issues. A less expensive option is to use throw rugs, especially indoor/outdoor rugs. These work great, come in so many colors and patterns, and if you shop around, you can find many for under $100.

Garage Door

Many online articles recommend you change the garage door. If you think you may want to use garage for cars again someday, consider instead simply purchasing a garage door insulation kit. Most cost under $100, but read reviews before you buy, and consider insulation thickness, R value, and ease of DIY installation. A fun option to consider for your project might be adding a rolling or retractable mosquito screen added to your garage door. Be prepared to spend more—prices range from under $300 up to $1,000 including installation. Want to keep the garage door but change its face? Check out GarageSkins. The wood veneer in this new product will apply quickly to a metal door and give the outside of the garage door a new look.

Windows

Be sure the windows are well insulated, or insulate them during wall installation. If your garage does not have any windows, consider adding one or two to provide the new room with more natural light. If you hire a contractor, the framing and labor to install a standard window typically costs under $1,000. Shop around for the best price on a new window and be sure it matches the look of windows in your home. And don’t skimp on price because it will be for the garage; purchase energy-efficient double-paned windows.

Room Design

Once you have completed converting your garage, you are ready to add the furnishings, wall coverings, and appropriate decor to complete the look. Even if you have opted for a more expensive conversion, say for creating an extra bedroom or guest room, watch for estate sales, or visit local consignment and antique stores. Shop around for unique, less expensive finds for your new space. Then just sit back, relax, and enjoy a little more room!

[/et_pb_text][/et_pb_column][/et_pb_row][et_pb_row column_structure="1_2,1_2" admin_label="Less Exp/More Exp Row" _builder_version="4.9.0" _module_preset="default" collapsed="on"][et_pb_column type="1_2" _builder_version="4.9.0" _module_preset="default"][et_pb_text admin_label="Less Expensive Title" _builder_version="4.9.0" _module_preset="default" text_text_color="#232323" text_font_size="20px"]

Less Expensive

[/et_pb_text][et_pb_image src="http://ownyourownparadise.com/wp-content/uploads/2021/03/ConvertGarage_LessExpensive_BlogPostPic.jpg" alt="Should You Convert Your Garage? - Less Expensive - Blog Post Photo" title_text="ConvertGarage_LessExpensive_BlogPostPic" admin_label="Less Expensive Image" _builder_version="4.9.0" _module_preset="default"][/et_pb_image][et_pb_text admin_label="Less Expensive Text" _builder_version="4.9.0" _module_preset="default" text_font_size="18px"]

  • Kids playroom
  • Parents retreat
  • Family room
  • Workout room or home gym
  • Game room
  • She shack
  • Man cave
  • Gardening or potting room

[/et_pb_text][/et_pb_column][et_pb_column type="1_2" _builder_version="4.9.0" _module_preset="default"][et_pb_text admin_label="More Expensive Title" _builder_version="4.9.0" _module_preset="default" text_text_color="#232323" text_font_size="20px"]

More Expensive

[/et_pb_text][et_pb_image src="http://ownyourownparadise.com/wp-content/uploads/2021/03/ConvertGarage_MoreExpensive_BlogPostPic.jpg" alt="Should You Convert Your Garage? - More Expensive - Blog Post Photo" title_text="ConvertGarage_MoreExpensive_BlogPostPic" admin_label="More Expensive Image" _builder_version="4.9.0" _module_preset="default"][/et_pb_image][et_pb_text admin_label="More Expensive Text" _builder_version="4.9.0" _module_preset="default" text_font_size="18px"]

  • Rental space
  • Guest house
  • Lounge and bar
  • Home office or work space
  • Movie theatre or home cinema
  • Art studio
  • Music room
  • Library

[/et_pb_text][/et_pb_column][/et_pb_row][et_pb_row admin_label="Info 2 Row" _builder_version="4.9.0" _module_preset="default" collapsed="on"][et_pb_column type="4_4" _builder_version="4.9.0" _module_preset="default"][et_pb_text admin_label="Info 2 Text" _builder_version="4.9.0" _module_preset="default"]

Tips for Converting Your Garage on Budget

When you convert your garage, consider keeping the conversion simple. The benefit to that is you'll be able to more easily convert it back later. There may come a time when you no longer need the extra space, or your budget allows you to add room onto the house; or you may someday decide to sell. (Keep always in mind that, depending on your location, converting may potentially be a double-edged sword. Be sure to do your homework so you understand how any changes you make could affect your home’s resale value.) The biggest benefit to keeping it simple? You can do the work more inexpensively, which is the focus of the updates and improvements described next. Most of these ideas you can also do yourself, which can help keep your costs down. (For even more ideas and inspiration, check out our Pinterest page.)

Heating and Cooling

If you have an attached garage, your current HVAC system may be able to support the extra space. For about $200, you can hire an HVAC inspector to assess whether or not your system can cover the garage. The cost of expanding a system with additional ducts and vents depends on the square footage of your garage, but typically, expanding a system can range between $500 and $2,000. It's important to also check with your local building department about any life-safety code issues with expansion to a garage. If an inspector assesses that your system won’t accommodate an expansion, you may have the option to update it, but that would also up your cost considerably. For a standalone garage, or when central heating and cooling expansion is out, reasearch these less costly options:

  • Forced air heater
  • Floor unit or overhead heater
  • Infrared heater
  • Gas or wood burner
  • Window air conditioning unit
  • Portable room air conditioner

Insulation

No matter how you heat or cool your garage, you should add insulation. Look into less expensive alternatives such as recycled foam board or spray foam. You can DIY either with a little help from the internet—there are scores of video to walk you through installation. If you live where winters are cold and want to create a comfortable environment for year-round use, you may need the more expensive, higher R-value insulation like what you have in your home. Factor your climate into every decision you make around converting the garage.

Walls

If your garage walls are unfinished (stud walls only), you’ll need to finish them before adding insulation. The problem is, most standard materials for finishing, such as wallboard (a.k.a, drywall), plywood, or paneling are expensive. There are less costly options to consider, including materials such as shiplap or galvanized metal. You’ll want to buy them pre-cut into panels if you DIY, so shop around for the best price when looking at these options. Of course, if your garage has finished walls, painting them does not have to be the only option. Peel and stick wallpaper is so inexpensive, easy to work with, and comes in so many variations, you can create any look for your space and apply it in a day. From brick to barn wood to tin and more, you can peel and stick your way to a new room.

Flooring

Depending on what you plan to use the new space for, you’ll find many options for garage flooring. Some less expensive options include:

  • Concrete paint kit (epoxy-based) for coating floor
  • Resurfacing kits for concrete floors
  • Acid-staining kits for concrete floors
  • Garage floor mats
  • Rubber or vinyl flooring rolls
  • Engineered wood flooring
  • Garage floor tiles

You can DIY all of these options with a bit of research and some prep time. Should you ever decide to convert the space back to a garage, the first three options in list above can stand up to cars as is, while the last four are removable, so you can return to the original concrete floor. You could also consider carpeting, but it is a more expensive option, and the space needs to be well-insulated to avoid mold and moisture issues. A less expensive option is to use throw rugs, especially indoor/outdoor rugs. These work great, come in so many colors and patterns, and if you shop around, you can find many for under $100.

Garage Door

Many online articles recommend you change the garage door. If you think you may want to use garage for cars again someday, consider instead simply purchasing a garage door insulation kit. Most cost under $100, but read reviews before you buy, and consider insulation thickness, R value, and ease of DIY installation. A fun option to consider for your project might be adding a rolling or retractable mosquito screen added to your garage door. Be prepared to spend more—prices range from under $300 up to $1,000 including installation. Want to keep the garage door but change its face? Check out GarageSkins. The wood veneer in this new product will apply quickly to a metal door and give the outside of the garage door a new look.

Windows

Be sure the windows are well insulated, or insulate them during wall installation. If your garage does not have any windows, consider adding one or two to provide the new room with more natural light. If you hire a contractor, the framing and labor to install a standard window typically costs under $1,000. Shop around for the best price on a new window and be sure it matches the look of windows in your home. And don’t skimp on price because it will be for the garage; purchase energy-efficient double-paned windows.

Room Design

Once you have completed converting your garage, you are ready to add the furnishings, wall coverings, and appropriate decor to complete the look. Even if you have opted for a more expensive conversion, say for creating an extra bedroom or guest room, watch for estate sales, or visit local consignment and antique stores. Shop around for unique, less expensive finds for your new space. Then just sit back, relax, and enjoy a little more room!

[/et_pb_text][/et_pb_column][/et_pb_row][/et_pb_section]

Posted in Home Owner Tips
Jan. 8, 2021

Should You Convert Your Garage?

Should You Convert Your Garage?


You’ve moved into a new home and already you’re bursting at the seams. You’ve discovered what most homeowners eventually learn: it doesn’t take long to fill every available space in a home. When that happens, and an addition is not in the budget, you do have another option. Convert your garage to a usable space. Sometimes, you just need more house, more than you need to house the car.

Converting vs. Adding to Make More Room

According to HomeAdvisor, “the average national cost of adding a room or building an addition is $43,892, with most homeowners spending between $20,899 and $67,431.” Depending on what you plan to use your garage for, converting it could cost as little as $1,500. In a separate survey, HomeAdvisor found that homeowners “paid between $5,997 and $19,281 [or] on average, converting a garage costs $12,043.” Bottom line: It can be more cost-effective to convert your garage.

Pro tip: You should also check with your local building department to see if a garage conversion requires a permit. You may not need one, or may only need one if you intend to have plumbing and/or a kitchen as part of a conversion. Regardless, permitting can be an added cost to consider.

Ideas for Your Garage Makeover

Once you have decided to convert your garage, it’s time for the fun part—deciding what type of room to create. Here are some of the most popular uses for a converted garage, sorted according to generally less- and more-expensive ideas. Often, a conversion can cost less when you already have the items you need more space for, like kids toys for a play room, or equipment for a gym, gaming, or office space. The biggest expense, after you convert a garage, will be buying those items that complete certain kinds of rooms, like a home cinema, bar, or a guest house.


Less Expensive
More Expensive
Less Expensive Kids Play Room More Expensive Artist Studio
  • Kids playroom
  • Parents retreat
  • Family room
  • Workout room or home gym
  • Game room
  • She shack
  • Man cave
  • Gardening or potting room
  • Rental space
  • Guest house
  • Lounge and bar
  • Home office or work space
  • Movie theatre or home cinema
  • Art studio
  • Music room
  • Library

Tips for Converting Your Garage on Budget

When you convert your garage, consider keeping the conversion simple. The benefit to that is you'll be able to more easily convert it back later. There may come a time when you no longer need the extra space, or your budget allows you to add room onto the house; or you may someday decide to sell. (Keep always in mind that, depending on your location, converting may potentially be a double-edged sword. Be sure to do your homework so you understand how any changes you make could affect your home’s resale value.)

The biggest benefit to keeping it simple? You can do the work more inexpensively, which is the focus of the updates and improvements described next. Most of these ideas you can also do yourself, which can help keep your costs down. (For even more ideas and inspiration, check out our Pinterest page.)

Heating and Cooling

If you have an attached garage, your current HVAC system may be able to support the extra space. For about $200, you can hire an HVAC inspector to assess whether or not your system can cover the garage. The cost of expanding a system with additional ducts and vents depends on the square footage of your garage, but typically, expanding a system can range between $500 and $2,000. It's important to also check with your local building department about any life-safety code issues with expansion to a garage. If an inspector assesses that your system won’t accommodate an expansion, you may have the option to update it, but that would also up your cost considerably.

For a standalone garage, or when central heating and cooling expansion is out, reasearch these less costly options:

  • Forced air heater
  • Floor unit or overhead heater
  • Infrared heater
  • Gas or wood burner
  • Window air conditioning unit
  • Portable room air conditioner

Insulation

No matter how you heat or cool your garage, you should add insulation. Look into less expensive alternatives such as recycled foam board or spray foam. You can DIY either with a little help from the internet—there are scores of video to walk you through installation.

If you live where winters are cold and want to create a comfortable environment for year-round use, you may need the more expensive, higher R-value insulation like what you have in your home. Factor your climate into every decision you make around converting the garage.

Walls

If your garage walls are unfinished (stud walls only), you’ll need to finish them before adding insulation. The problem is, most standard materials for finishing, such as wallboard (a.k.a, drywall), plywood, or paneling are expensive. There are less costly options to consider, including materials such as shiplap or galvanized metal. You’ll want to buy them pre-cut into panels if you DIY, so shop around for the best price when looking at these options.

Of course, if your garage has finished walls, painting them does not have to be the only option. Peel and stick wallpaper is so inexpensive, easy to work with, and comes in so many variations, you can create any look for your space and apply it in a day. From brick to barn wood to tin and more, you can peel and stick your way to a new room.

Flooring

Depending on what you plan to use the new space for, you’ll find many options for garage flooring. Some less expensive options include:

  • Concrete paint kit (epoxy-based) for coating floor
  • Resurfacing kits for concrete floors
  • Acid-staining kits for concrete floors
  • Garage floor mats
  • Rubber or vinyl flooring rolls
  • Engineered wood flooring
  • Garage floor tiles

You can DIY all of these options with a bit of research and some prep time. Should you ever decide to convert the space back to a garage, the first three options in list above can stand up to cars as is, while the last four are removable, so you can return to the original concrete floor.

You could also consider carpeting, but it is a more expensive option, and the space needs to be well-insulated to avoid mold and moisture issues. A less expensive option is to use throw rugs, especially indoor/outdoor rugs. These work great, come in so many colors and patterns, and if you shop around, you can find many for under $100.

Garage Door

Many online articles recommend you change the garage door. If you think you may want to use garage for cars again someday, consider instead simply purchasing a garage door insulation kit. Most cost under $100, but read reviews before you buy, and consider insulation thickness, R value, and ease of DIY installation.

A fun option to consider for your project might be adding a rolling or retractable mosquito screen added to your garage door. Be prepared to spend more—prices range from under $300 up to $1,000 including installation.

Want to keep the garage door but change its face? Check out GarageSkins. The wood veneer in this new product will apply quickly to a metal door and give the outside of the garage door a new look.

Windows

Be sure the windows are well insulated, or insulate them during wall installation. If your garage does not have any windows, consider adding one or two to provide the new room with more natural light. If you hire a contractor, the framing and labor to install a standard window typically costs under $1,000. Shop around for the best price on a new window and be sure it matches the look of windows in your home. And don’t skimp on price because it will be for the garage; purchase energy-efficient double-paned windows.

Room Design

Once you have completed converting your garage, you are ready to add the furnishings, wall coverings, and appropriate decor to complete the look. Even if you have opted for a more expensive conversion, say for creating an extra bedroom or guest room, watch for estate sales, or visit local consignment and antique stores. Shop around for unique, less expensive finds for your new space. Then just sit back, relax, and enjoy a little more room!

Posted in Home Owner Tips
Jan. 8, 2021

Beginner's Guide to Composting

[et_pb_section fb_built="1" _builder_version="3.22"][et_pb_row _builder_version="3.25" background_size="initial" background_position="top_left" background_repeat="repeat"][et_pb_column type="4_4" _builder_version="3.25" custom_padding="|||" custom_padding__hover="|||"][et_pb_text _builder_version="3.27.4" background_size="initial" background_position="top_left" background_repeat="repeat"]Did you know that up to 30% of what we throw away is yard and food scraps that can be composted? That’s a lot of material that doesn’t need to be taking up space in a landfill and producing greenhouse gasses. Best of all, that organic matter can become plant-feeding nutrient-rich compost you can use in your garden or for potted plants.

Benefits of Composting

If you like to garden, you’ve probably considered starting a compost pile or bin. Even if you’re not an avid gardener, composting has other environmentally friendly benefits too, including:

  • Reducing what goes into the landfill. As mentioned, about a third what goes into the landfill is organic material such as yard and food waste.
  • Recycling kitchen and yard waste. When this material decomposes in a landfill it contributes to methane gas (a type of greenhouse gas).
  • Helping soil retain water and reduce water loss. This not only reduces water use, but can help save on your utility bill.
  • Enriching soil. No matter the type of soil you have, adding compost can help. Is your soil sandy? Compost will help it retain water. Is your soil hard clay? Compost will help loosen it.
  • Reducing need for synthetic chemical fertilizers. Did you know chemical fertilizers in water runoff is a major contributor to pollution in our waterways?

Where to Compost

Composting can be as simple as creating a pile in your backyard, making a homemade bin, or purchasing special boxes, cones, and even tumblers (barrels or drums that rotate to mix the materials). Some cities and areas requires enclosed bins if you are composting food scraps, so check with your local government or waste company for guidance.

Here are the pros and cons of different composting methods and containers:

  • Piles:
    • Pros: simplest, least expensive method, as it needs no special equipment. Easy to access and turn the pile. Works great if you have lots of space and yard waste.
    • Cons: Can easily get too wet or too dry. Not a great choice if you have pets or critters who visit your backyard (raccoons, rats, possums, etc.)
  • Bins:
    • Pros: Looks nicer, contains compost, keeps moisture in, and helps keep animals out. Fairly easy to make if you are handy.
    • Cons: Can be expensive to purchase, depending on the type you choose.
  • Tumblers:
    • Pros: Makes compost quickly and easily. Good when space is an issue.
    • Cons: Can be expensive to buy and more involved to DIY.

Don’t have an outdoor space for composting? Consider vermicomposting, which works well indoors or in smaller spaces. Vermicomposting or worm composting is easy to maintain and doesn’t cost much, plus it can be a fun activity for young children to help with. You can buy a special bin for worm composting or make your own, but it will need to be inside so the worms don’t freeze in the winter or get too hot in the summer.

How to Start Composting

Composting works by decomposing organic material such as yard waste and kitchen scraps into a great amendment you can add to improve the quality of your soil. Making compost the right way (so it’s not smelly or messy) is a bit like following a recipe. For this recipe, you need four main ingredients:

  • Brown, or carbon-rich materials. This includes dry (hence “brown”) materials such as dried leaves, straw, woodchips, branches, etc. You can also add shredded recycled paper and cardboard to your compost.
  • Green, or nitrogen-rich materials. Fresh grass, tree, and shrub clippings are ideal. But you can also add kitchen scraps and manure (from horses, cows, and poultry), which are considered “green” materials—even though they aren’t “green” in color.
  • Water. Compost needs water, as dry materials are resistant to decomposition. To make compost, you need to keep things damp. But don’t let it get too wet, as excess moisture can keep out the last key ingredient, oxygen or air.
  • Air. While it might be tempting to try and tamp down your pile, the bacteria that help things decompose need oxygen to live. If your pile gets too wet or compacted, the good bacteria will die and things won’t decompose properly. You can keep your pile aerated by turning materials occasionally or poking holes in the pile with a pitchfork or stick.

[/et_pb_text][/et_pb_column][/et_pb_row][et_pb_row _builder_version="4.9.0" _module_preset="default"][et_pb_column type="4_4" _builder_version="4.9.0" _module_preset="default"][et_pb_text _builder_version="4.9.0" _module_preset="default"]

What to Include in Your Compost

Here’s what you should and shouldn’t include in your compost:

[/et_pb_text][et_pb_text _builder_version="4.9.0" _module_preset="default"]


  OK to Compost Not OK to Compost
GREENS
  • Fresh grass clippings
  • Fresh yard trimmings
  • Manure from cows, horses, or chickens
  • Fruit and vegetable scraps
  • Bread, rice, pasta (non-greasy)
  • Coffee grounds
  • Eggshells
  • Tea bags
  • Nut shells
  • Herbicide-treated clippings
  • Seed heads and roots for invasive weeds like ivy, morning glory, crabgrass, etc.
  • Pet waste
  • Meat, poultry, fish
  • Fat or oil
  • Greasy food scraps
  • Dairy products and eggs
BROWNS
  • Dried leaves
  • Twigs and small branches
  • Hay and straw
  • Woodchips, sawdust, or shavings
  • Shredded paper, cardboard,  paper towels
  • Wood ashes


  • Evergreen leaves (a little is OK)
  • Branches over a half-inch in diameter, blackberry stalks, and rose stems
  • Treated wood
  • Coated, colored, or wax paper
  • Charcoal ashes


[/et_pb_text][/et_pb_column][/et_pb_row][et_pb_row _builder_version="4.9.0" _module_preset="default"][et_pb_column type="4_4" _builder_version="4.9.0" _module_preset="default"][et_pb_image src="http://ownyourownparadise.com/wp-content/uploads/2021/03/Composting_Pic2_BlogPostPic.jpg" alt="Composting Diagram Photo" title_text="Composting_Pic2_BlogPostPic" align="center" _builder_version="4.9.0" _module_preset="default"][/et_pb_image][et_pb_text _builder_version="4.9.0" _module_preset="default"]

Creating the Right Compost Recipe

  1. If you have the option, it’s a good idea to place your compost pile or bin near a water source, and in a shadier location, if available.
  2. Your compost pile should have an equal amount of “green” and “brown” materials in alternate layers. So start with a layer of carbon-rich “brown” material, then one of nitrogen-rich “green” material, and repeat.
  3. Keep your compost pile moist, but don’t let it get too wet. This is where a lid on the bin helps, but you can use a tarp over your pile instead.
  4. Turn your pile with a pitchfork or shovel every week or two to make sure it gets air, and the temperature stays even. When your pile gets to about 3 ft. wide and 3 ft. tall, you can stop adding materials and start a new pile.
  5. It can take anywhere from three to six months to produce compost, depending on how balanced the mixture is and how attentively you tend to your pile.

[/et_pb_text][et_pb_image src="http://ownyourownparadise.com/wp-content/uploads/2021/03/Composting_Pic3_BlogPostPic.jpg" alt="Composting Steps Photo" title_text="Composting_Pic3_BlogPostPic" align="center" _builder_version="4.9.0" _module_preset="default"][/et_pb_image][et_pb_text _builder_version="4.9.0" _module_preset="default"]

Composting Tips and Troubleshooting

  • You can easily collect kitchen scraps in a store bought or DIY container.
  • If your compost is smelly or soggy, there may be too much “green” material, or not enough air. Add more “brown” materials, or turn the pile if it seems too compacted.
  • If your compost is too dry it will take a longer time to decompose.
  • If your pile attracts wild critters, make sure to bury your kitchen scraps to the middle of the pile.
  • Have too much yard waste? Your local waste company may also provide you with a separate barrel (often green or brown) for yard waste and other compostables. This material is then collected and composted at one or more central locations. Check with your waste company about what you can add to the barrel. Some places only allow yard waste, while other allow kitchen scraps as well.

[/et_pb_text][/et_pb_column][/et_pb_row][/et_pb_section]

Posted in Lifestyle
Jan. 7, 2021

Beginner's Guide to Composting

Beginner's Guide to Composting

Did you know that up to 30% of what we throw away is yard and food scraps that can be composted? That’s a lot of material that doesn’t need to be taking up space in a landfill and producing greenhouse gasses. Best of all, that organic matter can become plant-feeding nutrient-rich compost you can use in your garden or for potted plants.

Benefits of Composting

If you like to garden, you’ve probably considered starting a compost pile or bin. Even if you’re not an avid gardener, composting has other environmentally friendly benefits too, including:

  • Reducing what goes into the landfill. As mentioned, about a third what goes into the landfill is organic material such as yard and food waste.
  • Recycling kitchen and yard waste. When this material decomposes in a landfill it contributes to methane gas (a type of greenhouse gas).
  • Helping soil retain water and reduce water loss. This not only reduces water use, but can help save on your utility bill.
  • Enriching soil. No matter the type of soil you have, adding compost can help. Is your soil sandy? Compost will help it retain water. Is your soil hard clay? Compost will help loosen it.
  • Reducing need for synthetic chemical fertilizers. Did you know chemical fertilizers in water runoff is a major contributor to pollution in our waterways?

Where to Compost

Composting can be as simple as creating a pile in your backyard, making a homemade bin, or purchasing special boxes, cones, and even tumblers (barrels or drums that rotate to mix the materials). Some cities and areas requires enclosed bins if you are composting food scraps, so check with your local government or waste company for guidance.

Here are the pros and cons of different composting methods and containers:

  • Piles:
    • Pros: simplest, least expensive method, as it needs no special equipment. Easy to access and turn the pile. Works great if you have lots of space and yard waste.
    • Cons: Can easily get too wet or too dry. Not a great choice if you have pets or critters who visit your backyard (raccoons, rats, possums, etc.)
  • Bins:
    • Pros: Looks nicer, contains compost, keeps moisture in, and helps keep animals out. Fairly easy to make if you are handy.
    • Cons: Can be expensive to purchase, depending on the type you choose.
  • Tumblers:
    • Pros: Makes compost quickly and easily. Good when space is an issue.
    • Cons: Can be expensive to buy and more involved to DIY.

Don’t have an outdoor space for composting? Consider vermicomposting, which works well indoors or in smaller spaces. Vermicomposting or worm composting is easy to maintain and doesn’t cost much, plus it can be a fun activity for young children to help with. You can buy a special bin for worm composting or make your own, but it will need to be inside so the worms don’t freeze in the winter or get too hot in the summer.

How to Start Composting

Composting works by decomposing organic material such as yard waste and kitchen scraps into a great amendment you can add to improve the quality of your soil. Making compost the right way (so it’s not smelly or messy) is a bit like following a recipe. For this recipe, you need four main ingredients:

  • Brown, or carbon-rich materials. This includes dry (hence “brown”) materials such as dried leaves, straw, woodchips, branches, etc. You can also add shredded recycled paper and cardboard to your compost.
  • Green, or nitrogen-rich materials. Fresh grass, tree, and shrub clippings are ideal. But you can also add kitchen scraps and manure (from horses, cows, and poultry), which are considered “green” materials—even though they aren’t “green” in color.
  • Water. Compost needs water, as dry materials are resistant to decomposition. To make compost, you need to keep things damp. But don’t let it get too wet, as excess moisture can keep out the last key ingredient, oxygen or air.
  • Air. While it might be tempting to try and tamp down your pile, the bacteria that help things decompose need oxygen to live. If your pile gets too wet or compacted, the good bacteria will die and things won’t decompose properly. You can keep your pile aerated by turning materials occasionally or poking holes in the pile with a pitchfork or stick.

What to Include in Your Compost

Here’s what you should and shouldn’t include in your compost:


OK to Compost

Not OK to Compost

GREENS

  • Fresh grass clippings
  • Fresh yard trimmings
  • Manure from cows, horses, or chickens
  • Fruit and vegetable scraps
  • Bread, rice, pasta (non-greasy)
  • Coffee grounds
  • Eggshells
  • Tea bags
  • Nut shells
  • Herbicide-treated clippings
  • Seed heads and roots for invasive weeds like ivy, morning glory, crabgrass, etc.
  • Pet waste
  • Meat, poultry, fish
  • Fat or oil
  • Greasy food scraps
  • Dairy products and eggs

BROWNS

  • Dried leaves
  • Twigs and small branches
  • Hay and straw
  • Woodchips, sawdust, or shavings
  • Shredded paper, cardboard,  paper towels
  • Wood ashes


  • Evergreen leaves (a little is OK)
  • Branches over a half-inch in diameter, blackberry stalks, and rose stems
  • Treated wood
  • Coated, colored, or wax paper
  • Charcoal ashes

What to compost infographic

Creating the Right Compost Recipe

  1. If you have the option, it’s a good idea to place your compost pile or bin near a water source, and in a shadier location, if available.
  2. Your compost pile should have an equal amount of “green” and “brown” materials in alternate layers. So start with a layer of carbon-rich “brown” material, then one of nitrogen-rich “green” material, and repeat.
  3. Keep your compost pile moist, but don’t let it get too wet. This is where a lid on the bin helps, but you can use a tarp over your pile instead.
  4. Turn your pile with a pitchfork or shovel every week or two to make sure it gets air, and the temperature stays even. When your pile gets to about 3 ft. wide and 3 ft. tall, you can stop adding materials and start a new pile.
  5. It can take anywhere from three to six months to produce compost, depending on how balanced the mixture is and how attentively you tend to your pile.

How to compost infographic

Composting Tips and Troubleshooting

  • You can easily collect kitchen scraps in a store bought or DIY container.
  • If your compost is smelly or soggy, there may be too much “green” material, or not enough air. Add more “brown” materials, or turn the pile if it seems too compacted.
  • If your compost is too dry it will take a longer time to decompose.
  • If your pile attracts wild critters, make sure to bury your kitchen scraps to the middle of the pile.
  • Have too much yard waste? Your local waste company may also provide you with a separate barrel (often green or brown) for yard waste and other compostables. This material is then collected and composted at one or more central locations. Check with your waste company about what you can add to the barrel. Some places only allow yard waste, while other allow kitchen scraps as well.
Posted in Lifestyle
Jan. 7, 2021

Delicious Hot Drinks for Winter

[et_pb_section fb_built="1" admin_label="section" _builder_version="3.22"][et_pb_row admin_label="row" _builder_version="3.25" background_size="initial" background_position="top_left" background_repeat="repeat"][et_pb_column type="4_4" _builder_version="3.25" custom_padding="|||" custom_padding__hover="|||"][et_pb_text admin_label="Text" _builder_version="3.27.4" background_size="initial" background_position="top_left" background_repeat="repeat"]Whether you live where the winter temps stay chilly day and night, or you live in a milder clime, where a warm nighttime beverage is just the ticket, here are five recipes for deliciously hot drinks that each offer a twist on favorite wintertime beverages.

Hot Apple-Cranberry Cider

4 cups apple cider

4 cups cranberry juice (not cranberry cocktail)

Brown sugar to taste

4 cinnamon sticks

Pinch of whole cloves

Combine apple cider and cranberry juice in a large pot. Add brown sugar to taste if you like a sweeter cider. Add cinnamon sticks and cloves. Bring to a boil and then simmer for 5-10 minutes. Strain to remove spices and serve warm.

Easy Hot Chai Tea Apple Cider

Combine chai tea (regular or decaf) and apple cider to make a quick sweet-and-spicy treat.

1 chai tea bag

1 cup apple cider

In a microwave safe mug, microwave apple cider on high for 1-2 minutes, or until hot. Add chai tea bag and let steep 3-5 minutes.

Peanut Butter Hot Chocolate

8 oz. milk (or non-dairy milk)

1 Tbsp. smooth peanut butter

1 Tbsp. cocoa powder

1 Tbsp. sugar or equivalent sweetener

Toppings: Chocolate chips, chopped peanuts, whipped cream

Heat milk in a saucepan over medium heat until it just starts to simmer. Add peanut butter, cocoa powder, and sugar. Whisk together until dissolved. Remove from heat, and top with whipped cream, and chocolate chips.

Quick Nutella Coffee

2 tsp. Nutella

1 cup hot coffee

Half-and-half or milk (optional)

Whipped cream

Start with a hot cup your favorite freshly brewed coffee. Add Nutella and stir until it melts. Add milk or half-and-half to taste and top with whipped cream.[/et_pb_text][et_pb_text _builder_version="4.9.0" _module_preset="default"]

Hot Chocolate with Toppings

Try these hot chocolate recipes and experiment with the many fun toppings options.

[/et_pb_text][/et_pb_column][/et_pb_row][et_pb_row column_structure="1_2,1_2" _builder_version="4.9.0" _module_preset="default"][et_pb_column type="1_2" _builder_version="4.9.0" _module_preset="default"][et_pb_text _builder_version="4.9.0" _module_preset="default"]

Toppings

Crushed peppermint or candy canes

Caramel sauce or caramel pieces

Sweetened coconut flakes

Candy sprinkles

Cocoa puff cereal

Chocolate cookie crumbles Peanuts

[/et_pb_text][/et_pb_column][et_pb_column type="1_2" _builder_version="4.9.0" _module_preset="default"][et_pb_image src="http://ownyourownparadise.com/wp-content/uploads/2021/03/HotWinterDrinks_Pic1_BlogPostPic.jpg" alt="Delicious Hot Drinks For Winter - Hot Cocoa Photo" title_text="Hot chocolate with melted snowman" _builder_version="4.9.0" _module_preset="default"][/et_pb_image][/et_pb_column][/et_pb_row][et_pb_row _builder_version="4.9.0" _module_preset="default"][et_pb_column type="4_4" _builder_version="4.9.0" _module_preset="default"][et_pb_text _builder_version="4.9.0" _module_preset="default"]

Bonus Topping

Make some Marshmallow Snowman Toppers to add for fun or to delight a loved one:

Large marshmallows

Pretzel sticks

Candy corn

Chocolate syrup (or cake decorating gel)

Connect three marshmallows with pretzel sticks, then add the pretzel sticks for arms (and legs if you want). Add candy corn for the nose. Use melted chocolate or cake decoration gel to add eyes, mouth, and buttons.

[/et_pb_text][/et_pb_column][/et_pb_row][/et_pb_section]

Posted in Lifestyle